How to Set Up QR Ordering in Your Restaurant: Step-by-Step Guide
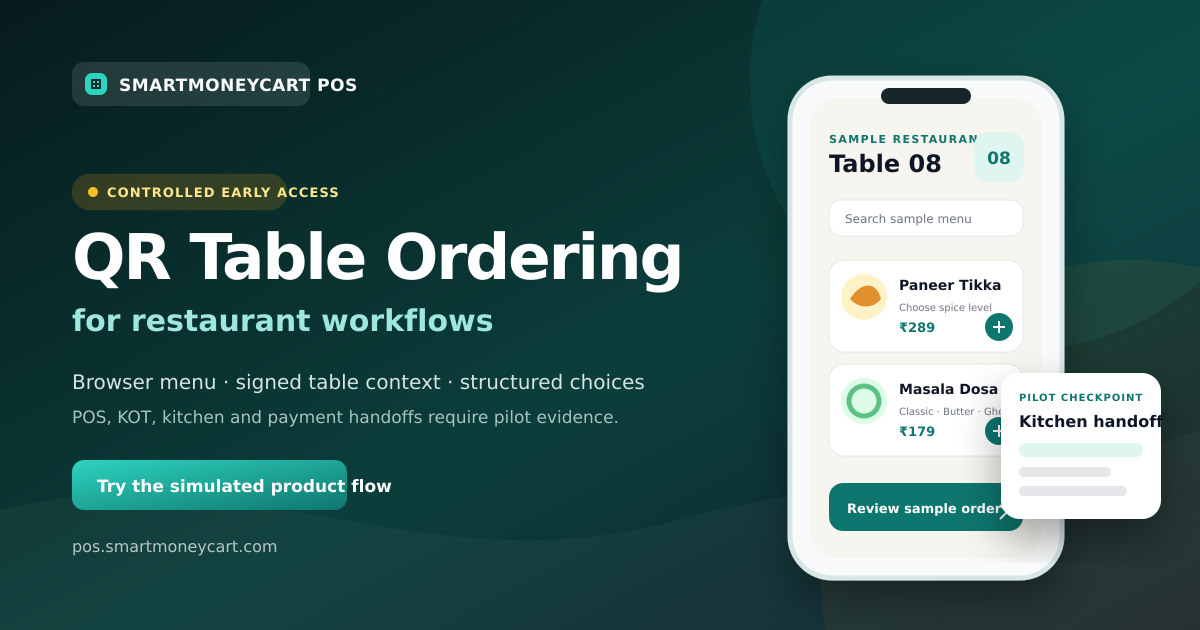
A working setup plan restaurant owners can use from menu cleanup and table mapping through staff training, testing and controlled launch.
Quick answer: To set up QR ordering in a restaurant, prepare a clean digital menu, give every participating table a stable number, generate and label table-specific codes, define the staff and kitchen handoff, test on real phones, train the team and launch with a small controlled pilot. Enable payment or automatic downstream steps only when they have been configured and verified for the outlet.
The code itself is usually the easiest part. Most setup problems come from an unclear menu, moved table cards, missing modifiers, uncertain staff ownership or an untested exception path.
Use this guide as an operating checklist. SmartMoneyCart QR ordering is currently in controlled early access, so the SmartMoneyCart-specific POS, KOT, kitchen and payment paths must be confirmed for the target restaurant before activation.
Step 1: Define what QR ordering should solve
Write down the service problem before choosing screens or printing cards. A restaurant might want guests to view a current menu, place an optional table request, add a second round, or reduce repeated menu explanation. These are different scopes.
Choose the first rollout boundary:
- menu viewing only;
- selection and staff-reviewed request;
- a configured order-submission workflow;
- POS-linked ordering after verification;
- payment only where outlet-specific verification is complete.
Also decide where QR will not be used. You may keep waiter ordering for special requests, large groups or guests who prefer personal service. A limited, clear workflow is easier to train and test than an ambitious one with unknown handoffs.
Step 2: Prepare the digital menu
Start from the menu that staff and billing already recognise. Remove discontinued items and duplicate names. Confirm categories, display order, prices and tax configuration with the responsible business owner or adviser.
For every item, record:
- a short, recognisable name;
- a useful description where guests need context;
- current price returned from the authoritative system;
- vegetarian or other dietary information only when the restaurant maintains it accurately;
- sizes or variants;
- required choices, such as a drink size;
- optional add-ons, such as extra cheese;
- availability rules;
- preparation notes the kitchen can actually follow.
Avoid hiding important choices inside a free-text note. If a cappuccino requires a size and milk selection, model them as structured modifiers. The guest should see any price difference before submitting the cart.
Photographs are optional. If you use them, make sure they show the right item, load efficiently on mobile and include meaningful alternative text. A clear text menu is better than a slow page full of misleading images.
Step 3: Map the restaurant tables
Create one stable table list. Use the same names on the floor plan, table card, staff screen and kitchen or billing record. “T4,” “Table 4” and “Garden Four” should not refer to the same table in different places.
For each table, note:
- displayed table name;
- section or floor;
- capacity where useful;
- whether QR ordering is enabled;
- location of the printed card;
- person responsible for checking the card.
Consider movable tables. If two tables are joined for a group, decide whether staff will keep one table code active, merge the operational bill through an approved process or temporarily use waiter ordering. Do not improvise this during a rush.
Step 4: Define the customer journey
Sketch the journey before configuration:
- Guest notices the table card.
- Guest scans the QR code.
- Restaurant and table context appears.
- Guest browses categories and items.
- Guest selects quantities and modifiers.
- Guest reviews the cart.
- Guest continues through the enabled submission path.
- The interface explains what happens next.
Write the exact confirmation message. “Request received for staff review” means something different from “Order accepted.” Do not tell a guest that the kitchen has received an order unless that handoff is verified and represented accurately.
Include an obvious way to ask staff for help. The table card and browser page should not make the phone the only route to service.
Step 5: Define the restaurant-side workflow
Assign a person or role to each state. Who notices a new request? Who checks the table? Who resolves an unavailable item? Who can correct or cancel a line? Who checks the bill before payment?
A simple responsibility table for the team might be:
| Stage | Responsible role | Evidence to check |
|---|---|---|
| Menu update | Manager | Guest and POS show the intended item and price |
| New request | Waiter or cashier | Correct table and complete item choices |
| Kitchen handoff | Assigned staff or verified integration | Matching item, quantity, modifier and note |
| Bill review | Cashier | Accepted items and payment record agree |
| Exception | Shift manager | Correction recorded without a duplicate order |
If the system is not configured to create an operational order automatically, document the staff review step. Accuracy matters more than pretending the workflow is fully automated.
Step 6: Generate and label QR codes
Generate a separate code for each table when table identity is part of the workflow. The public URL should avoid exposing unnecessary internal identifiers, and the system should provide a way to invalidate an old code when required.
Every card should show:
- restaurant name or logo;
- visible table name;
- a short instruction such as “Scan to view the menu and request items”;
- availability wording that matches the actual workflow;
- a staff-help option;
- enough contrast and quiet space around the code.
Do not print “Order and pay instantly” if payment or direct acceptance has not been proven. If the current path is early access or staff reviewed, say so in the relevant test environment.
Print one sample at the intended physical size before producing the full batch. Laminated glare, low contrast, a curved stand or a very small code can make scanning unreliable.
Step 7: Scan-test every physical code
Do not test only the digital QR image on the manager's phone. Test the printed card in the lighting and position where guests will use it.
For every table:
- Scan with at least two representative supported phones.
- Check that the browser shows the correct restaurant.
- Check that the visible table name matches the physical table.
- Open several menu categories.
- Add an item with required modifiers.
- Add, reduce and remove quantities.
- Review the cart and confirmation wording.
- Verify that an old or disabled code follows the intended safe path.
Record the result against the table list. A quick scan without checking table context is not enough.
Step 8: Test the complete ordering path
Create a small acceptance menu that covers the risky cases:
- one simple item;
- one item with a required variant;
- one item with optional add-ons;
- one temporarily unavailable item;
- one item with a bounded cooking note;
- an initial request and an additional round;
- two phones using the same table;
- a repeated tap or network retry;
- a correction before billing.
Compare each accepted line across the guest confirmation, staff view and downstream record. The server, not the browser, should be authoritative for current price and availability.
SmartMoneyCart has code paths for table-specific sessions, structured modifiers and server validation. Request a controlled restaurant QR ordering walkthrough to verify the exact build and outlet configuration you will use.
Step 9: Verify POS and kitchen coordination
If POS integration is part of the intended scope, verify the same menu source, table, order reference and bill behaviour. Test whether a QR request creates a new order, updates an open table order or waits for staff review. The expected behaviour must be written down.
For the kitchen, inspect the actual ticket or kitchen display workflow. Confirm:
- item name and quantity;
- every operational modifier;
- cooking note;
- table and order reference;
- initial versus additional-round items;
- correction or cancellation handling;
- timing and refresh behaviour.
The existence of POS and KOT code is not a launch result. SmartMoneyCart QR-to-POS and QR-to-kitchen handoffs remain controlled-pilot checkpoints until matching target-environment evidence is recorded.
Step 10: Configure payment only where applicable
QR ordering does not require online payment. A restaurant can keep its existing counter or table payment process if that is clearer for the first rollout.
If online payment is planned, use the outlet's intended provider account and test successful, failed, expired, late and duplicate attempts. Confirm capture status, settlement ownership, refunds and reconciliation. Train staff to trust verified server status rather than a screenshot on the customer's phone.
Do not copy payment methods or fees from a generic sales deck. Get the current supported scope and commercial terms in writing. SmartMoneyCart does not currently advertise online QR payment as generally available.
For counter payment, make the next step clear to the guest and make sure staff can record the settlement once without creating a duplicate bill.
Step 11: Train front-of-house and kitchen staff
Run a short role-based practice session using the real table cards.
Front-of-house staff should practise:
- helping a guest scan or choose staff ordering;
- spotting the wrong table context;
- recognising and reviewing a new request;
- handling an unavailable item;
- preventing duplicate entry;
- adding a staff-taken item to the correct bill;
- escalating an exception.
Kitchen staff should practise reading modifiers, additional rounds, corrections and order references. Cashiers should practise bill review and each enabled payment path.
Give every shift a one-page fallback. It should say who can disable the QR path, how guests are informed and how service continues through staff ordering.
Step 12: Launch as a controlled pilot
Choose one table, one section or one quieter service period. Tell staff what is being tested and keep a visible issue log.
For every exception, record:
- time and table;
- guest action;
- expected result;
- observed result;
- staff workaround;
- whether an order, bill or payment record was affected;
- owner and resolution.
Review the log after service. Expand only when critical issues are closed and the team can explain the workflow without guessing.
Restaurant QR ordering launch checklist
Use this as the final go/no-go review:
- [ ] Scope and service problem are documented.
- [ ] Menu, prices and availability are reviewed.
- [ ] Required variants and add-ons are structured.
- [ ] Table names match everywhere.
- [ ] Every printed QR code passes a physical scan test.
- [ ] Restaurant and table context are visible to the guest.
- [ ] Staff ownership is clear for every request and exception.
- [ ] Initial and additional rounds are tested.
- [ ] Two-phone and retry behaviour are tested.
- [ ] POS handoff passes where enabled.
- [ ] Kitchen handoff passes where enabled.
- [ ] Payment states and reconciliation pass where enabled.
- [ ] Staff-assisted ordering remains available.
- [ ] Privacy notices and customer-data choices match the actual collection.
- [ ] Rollback or disable steps are documented.
- [ ] The pilot owner signs the acceptance record.
What common setup mistakes should restaurants avoid?
Printing codes before the menu is ready
The code may remain the same, but an unfinished menu produces a poor first test. Complete the representative item and modifier set first.
Using one generic code when table identity matters
Asking guests to type a table number creates another error opportunity. Use table-specific context when the system and service model support it.
Treating a submitted cart as an accepted kitchen order
Use confirmation wording that matches the verified handoff. A request may still need staff review.
Removing the waiter option
Guests may have accessibility needs, questions, allergies or no suitable phone. Keep a human path.
Testing only the happy path
Unavailable items, retries, wrong tables, additional rounds and payment exceptions are normal test cases, not edge cases to postpone.
Launching every table at once
A small pilot makes it possible to notice, contain and correct a process problem without disrupting the whole restaurant.
How should SmartMoneyCart fit into the setup?
Use the complete QR ordering guide for Indian restaurants to decide the intended scope. Review the standard restaurant POS workflow and current POS pricing separately from QR access.
Then try the simulated QR demonstration and request early access with your menu, table count and service model. SmartMoneyCart can scope the controlled review, but the public demo does not create a production order, KOT or payment.
The best setup outcome is not the largest feature list. It is a workflow the guest understands, staff can recover and the restaurant can verify from scan to final record.
Start Free Forever · Read more SmartMoneyCart guides
By Adarsh Osle · Published 2026-08-09T00:00:00.000Z · Updated 2026-08-09T00:00:00.000Z
Quick answer
Quick answer: Set up restaurant QR ordering with a practical checklist for menus, table numbers, QR codes, staff, kitchen coordination, testing and launch. SmartMoneyCart POS connects this topic to practical billing, GST invoices, KOT, staff controls, payment reconciliation and owner reports for Indian restaurants, cafes, cloud kitchens, kirana stores and retail businesses.
Key takeaways
- Use this topic as an owner checklist, not just a reading exercise.
- Test GST invoices, KOT, WhatsApp invoices, staff permissions and day-end reports before changing POS software.
- SmartMoneyCart POS includes a Free Forever Starter plan with unlimited billing and orders.
How to use this QR Ordering guide
This article is written for Indian restaurant, cafe, cloud kitchen, kirana and retail owners who need practical decisions rather than generic POS advice. Use it as a working checklist during billing setup, menu review, GST reporting, staff training or day-end reconciliation.
The core idea behind "How to Set Up QR Ordering in Your Restaurant: Step-by-Step Guide" is simple: every operational topic should connect back to measurable owner controls. A POS system should help you see what sold, who billed it, how it was paid, whether GST was correct, which items leaked margin and what action is needed tomorrow morning.
For a small outlet, even a tiny daily mismatch becomes meaningful over a month. A ₹300 payment mismatch, a ₹500 wastage leak or a few unapproved discounts can become a larger problem than a marketing campaign can fix. That is why the article connects the topic back to billing reports, audit trails and weekly review habits.
Owner checklist
- Check the last seven days of item sales and identify the top five profit drivers.
- Compare UPI, cash, card and delivery-channel totals before closing the day.
- Review void bills, discounts and refunds by staff member.
- Confirm GST invoices include correct customer, HSN/SAC and tax details.
- Link the lesson from this article to one specific POS report you will check weekly.
Example calculation for owners
| Metric | Example | Decision |
|---|---|---|
| Daily sales | ₹18,000 | Compare against item mix and staff shift. |
| Discount leakage | ₹650/day | Audit staff permissions and coupon use. |
| Payment mismatch | ₹420/day | Reconcile UPI/cash/card before closing. |
| Monthly impact | ₹12,600+ | Fix process before adding more marketing spend. |
Related SmartMoneyCart resources
- restaurant POS software for billing, KOT and owner reports.
- restaurant POS evaluation guide for buying criteria.
- POS software under ₹500/month for plan evaluation.
- GST billing software for invoice fields, HSN/SAC and report exports.
- cloud kitchen POS software margin guide for delivery-first operators.
Frequently asked questions
- What do I need before setting up restaurant QR ordering?
- Prepare a clean digital menu, stable table names, a documented staff and kitchen handoff, supported devices, reliable connectivity and a fallback ordering method.
- Should every restaurant table have a different QR code?
- Use table-specific codes when the ordering workflow needs to identify the guest's table. Test every printed code against the table shown on the customer and staff screens.
- Should online payment be enabled on launch day?
- Only if the provider, payment states, settlement, refunds and reconciliation have been configured and verified for that outlet. Otherwise keep a clearly explained counter or staff payment path.
- How should a restaurant launch QR ordering?
- Start with staff-only testing, then one table or one quiet service period, record exceptions, fix the workflow and expand only after the acceptance checklist passes.